Uncategorized

Assignment 1 | Transmedia Story Proposal (Reflection)

screen-shot-2018-08-17-at-23-53-25.png

For our digital story, we ‘The Digi Dames’ have decided to document Melbourne street art in a few different ways and explore its role in the issues of gentrification, brandalism, and depoliticisation. To be honest, I had no idea what those words mean at first. Those words sounded strange to me. But then, as we kept discussing the idea and with the help of Janine who explained it really clearly, I finally understood the meaning of them.

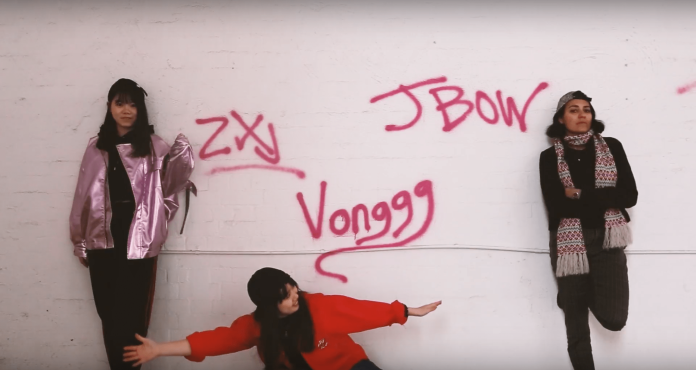
While developing our idea about Melbourne street art, we thought it would be interesting if we made something different for the video pitch. Since this project is more about the visual arts, we decided to actually pitch our idea through street art that we made. It was like letting the art speak for itself! Also, I enjoy expressing myself through art more so than I do in any other medium, so it was fun to be able to take my thoughts and turn them into a word painting (as seen in our video).

I was given the responsibility of mainly editing our video pitch and building an effective social media strategy in which all members could execute through social platforms on a regular basis. This really excites me because I love making posts for social media especially Instagram. According to Statista (2017), the use of Instagram is mainly attributed to its visually appealing nature combined with a high number of daily visitors. I totally agree with that and I personally think that Instagram will have a big impact on promoting our project. Moreover, Instagram has an analytics feature that can be used to highlight the most popular post in the recent weeks.

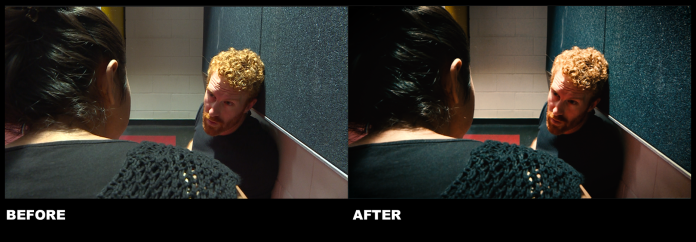
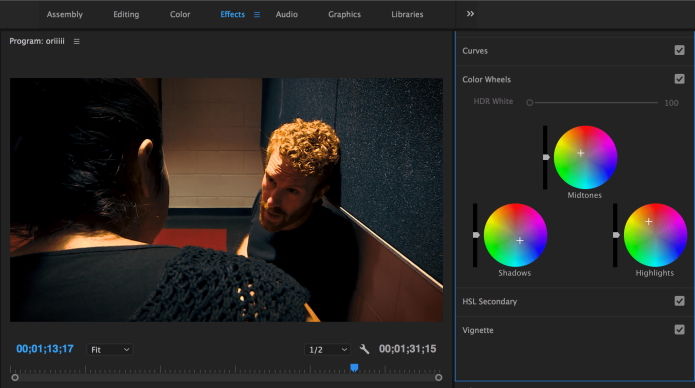
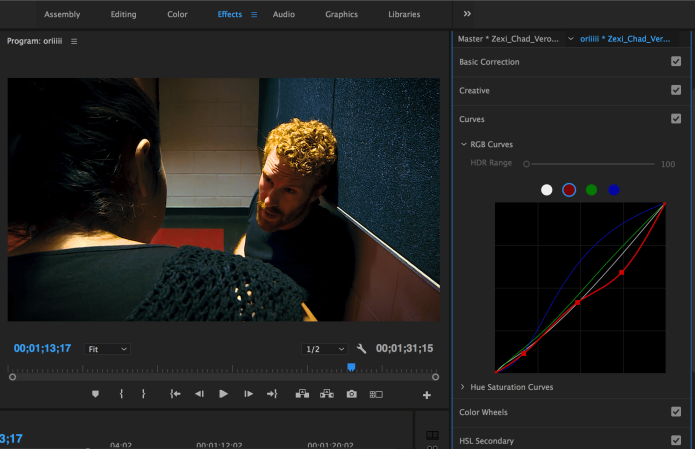
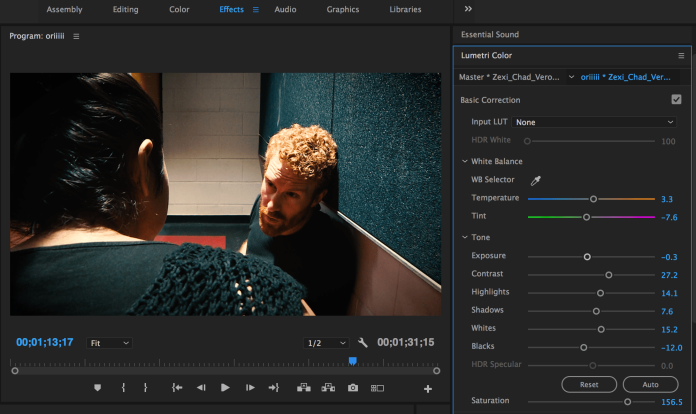
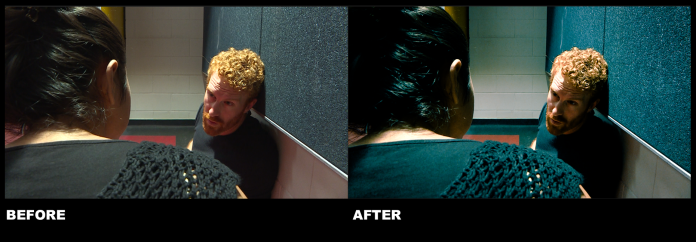
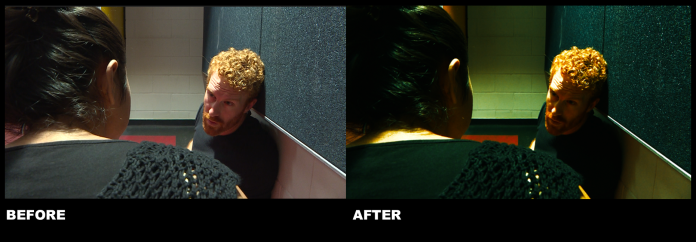
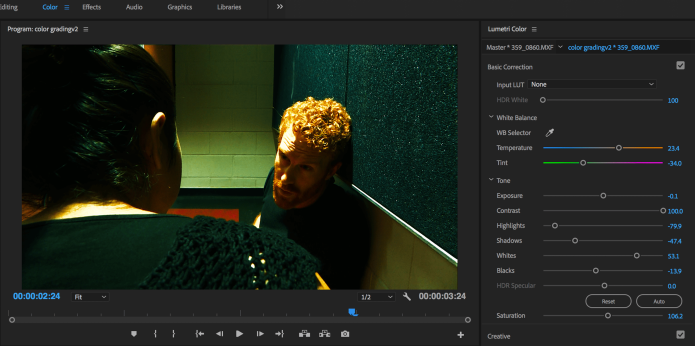
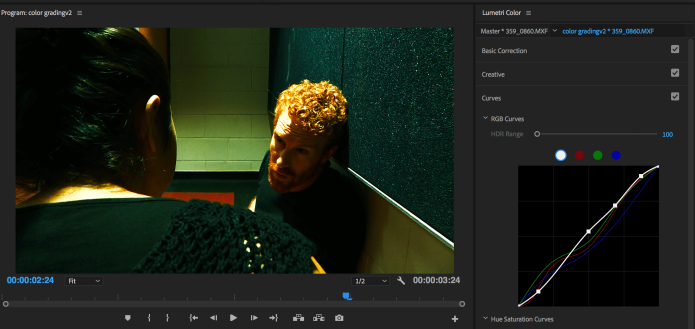
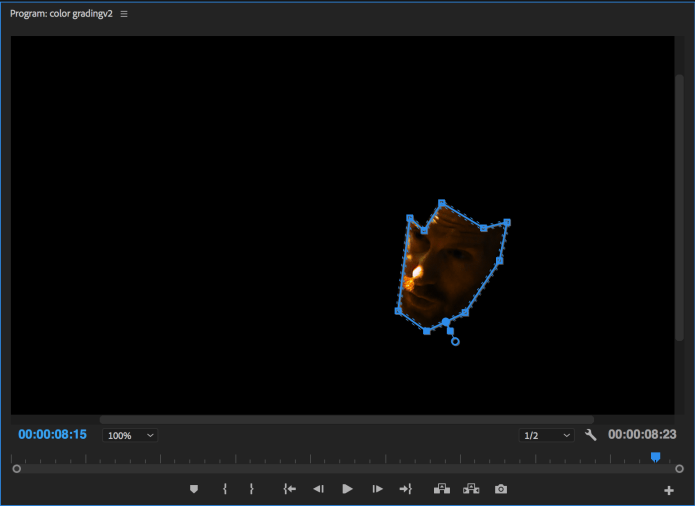
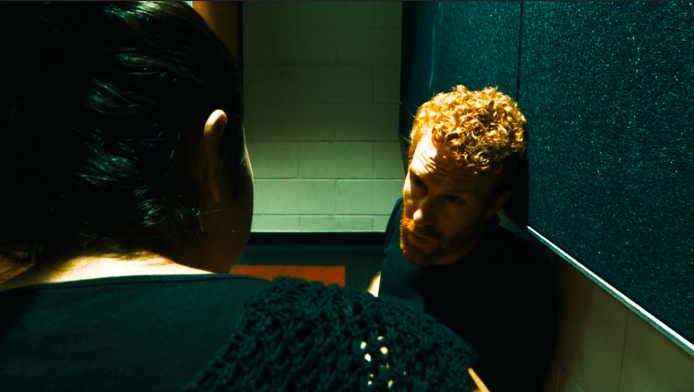
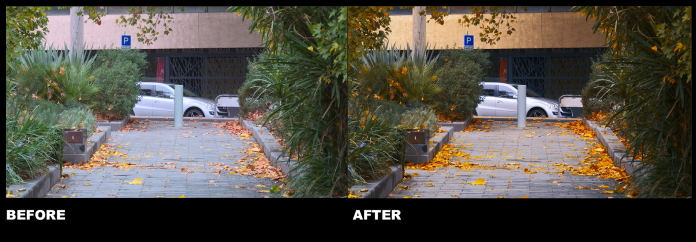
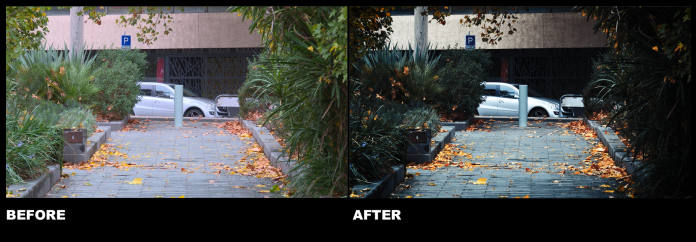
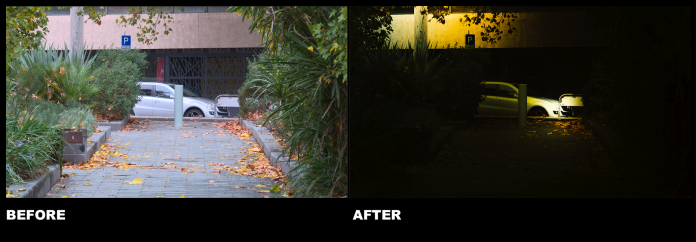
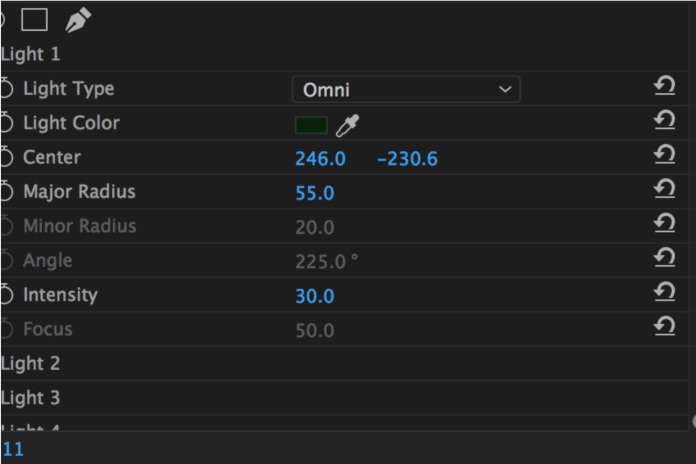
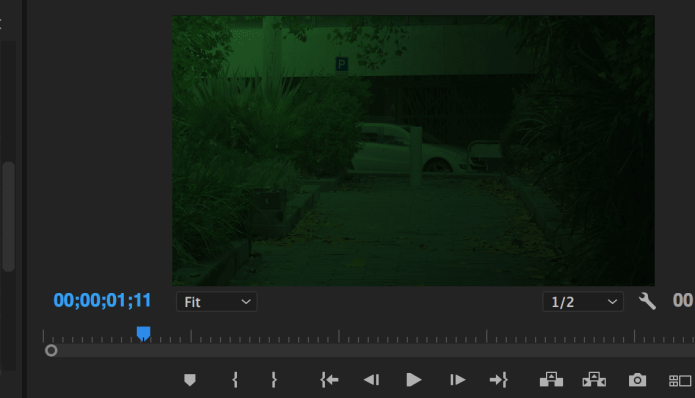
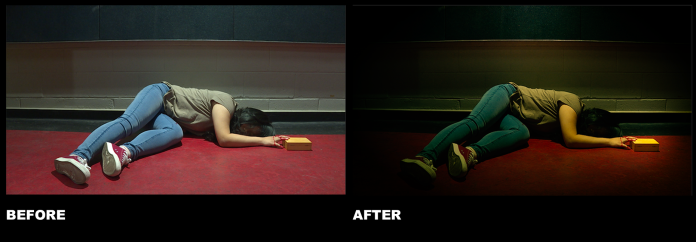
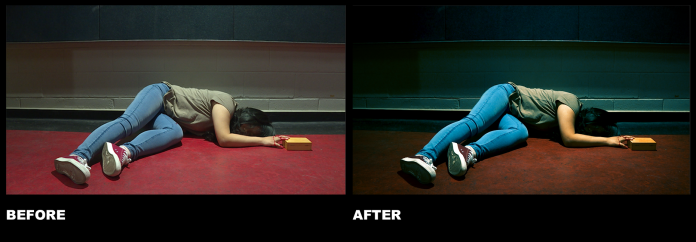
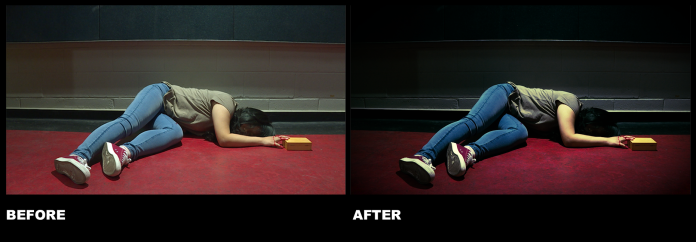
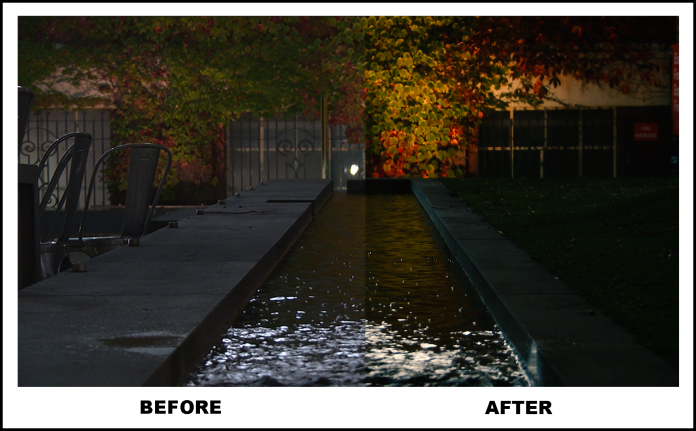
Editing has always been one of my favorite pastimes and it’s the technical side of video that excites me the most. I learned a lot of new things through editing the video as well as refreshing my memory on things that I already knew, and just needed a reminder about. In addition, I also try to make our logo in a graffiti mode in Photoshop. I think it would be cool if we create Grafitti logo as we are doing the Melbourne Street Art project. Below is the before and after:

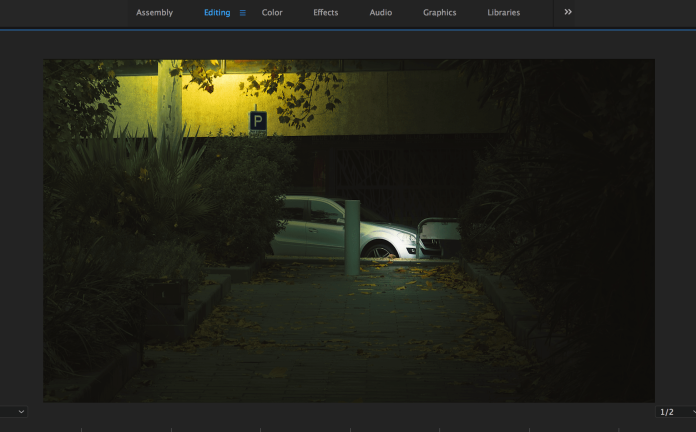
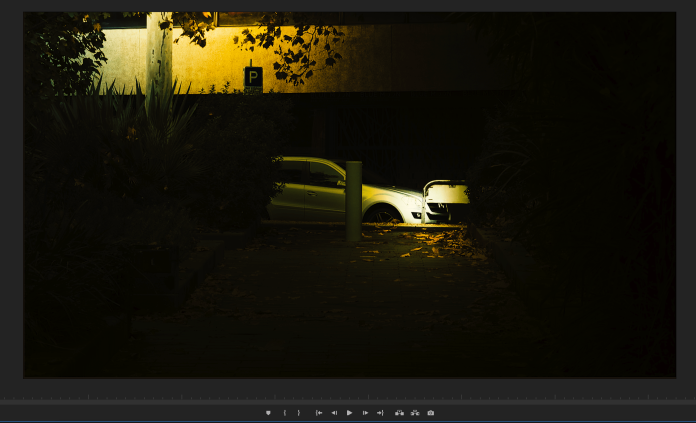
The issue I faced was making the video as dynamic as possible and finding the right non-copyright music. Also, I had to learn how to make an animated title because I hadn’t done one before. So I tried to find some articles and tutorials online to improve my editing skills. The result was not satisfactory to me and it is not smooth enough I guess (can be seen in the video min 0.17). But I will try to practice more and improve it next time. Moreover, I had an issue with slowing the video down as well. It was not as smooth as I think it will be and looks a bit weird. I think it would be better if I try to set the camera on the slow-motion mode during filming next time rather than editing it afterward.

Also, it was challenging to ensure that people understand what the meaning of the video is. This has raised a few questions for me such as “Is the explanation clear enough?” “Is the video too fast or too short for people to understand?“. As many people find it difficult to understand any text in the video,  it’s essential to make it really simple. According to Olga (n.d.), by breaking it into “smaller chunks and placing each phrase on a separate slide” it will help the audience follow the message.

Another issue that I had is the language barrier. As an international student, I have communication difficulties which often make it hard for me to express my ideas. For example, it is quite hard for me to write a good caption that attracts people. I need to learn how to put words together and make it simple and understandable. However, I am eager to learn and develop my communication skills more.

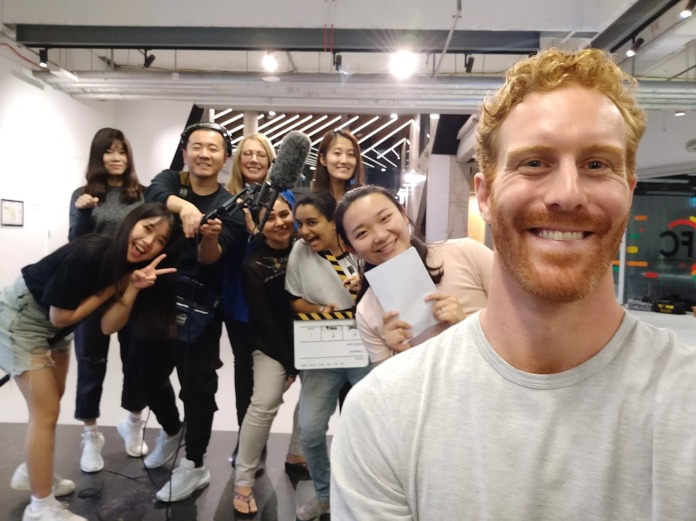
In conclusion, this assessment has started to develop my understanding of making a digital story proposal and the importance of the social media for our branding and marketing. It’s such an amazing experience for me to be part of this multicultural group. I personally think that we make a pretty good team! In the future, we will work closely together with selected artists from the Melbourne street art community to create and provide more pictures, posts, and interviews.

In order to promote our project, we created three social media accounts for DIGI DAMES | Melbourne Street Art. The links to the social media accounts that we have created for this project are as follows:

Website: https://thedigidames.wixsite.com/mysite

Instagram: https://www.instagram.com/thedigidames/

Facebook: https://www.facebook.com/thedigidames/

YouTube: https://www.youtube.com/channel/UCOnqXG8zy_IBGjwe5T9t8Hg


References:

Standard
Sound and Image

Assignment 3| #7 Reflection on the course

“In 200 words or less please outline your goals, desires – what you want to get out of this semester. You will review this later in the course. You may rethink this dramatically – this is a good thing.” You were asked this at the beginning of the semester. Now, could you review constructively what you got from this semester –  has the course lived up to your expectations, delivered what you expected, maybe even surpassed it?

S__19128332

As this course comes to an end, I have realized that time flies so fast. At the beginning of the semester, I haven’t really set my goal but this course has live up to my expectations. I have definitely developed my knowledge on filmmaking including editing skills. One of the examples is while watching movies sometimes I may have noticed  the change in the camera angles or the camera would focus on a certain person, but I had no idea why the they did it like that. What was the purpose of that change in angle or focus? What was the director trying to convey to the audience? However since we often discussed and critically analysed parts of the film such as the camera angles and movements, lighting, music and costumes, it allows me to get a better understanding of the the elements and factors that go into making them, especially while I was doing the Lenny exercise.

Also, I have had an opportunity to work in a group for each project. Throughout the group work, I learned how to collaborate with others and share the knowledge and ideas within the group. Moreover, I had the opportunity to gain knowledge and experience from people that have more expertise than me.

From taking this class, I have learned that my preferred learning style is visual and practical. I learn best from a lot of practices that we did in the class. I remembered there was one time that Paul asked me to operate the camera in the class. I was so nervous and a bit insecure at that time because I rarely used the camera and I didn’t know much about it. But I want to thank Paul for that because from that moment, I got a deeper understanding about the details of the camera and how to properly operate the camera. 

In the end, it was a great experience and it was really fun working with an awesome group of people. I enjoyed learning how to operate a camera, analysing a scene, reflecting upon the exercises that we did in class. Also, I’m glad that they appreciate the process more than the result. Hopefully I will be able to use the skills that I gained from this course in media industry later on.

Standard
Sound and Image

Assignment 3| #6 The Abstract / Haiku Edit

Compress your Abstract  / Haiku editing exercise. Then upload it to your google drive and paste a clickable hyperlink or embed it on your blog using these instructions.Then reflect on the whole process. Consider: the quality and usability of your recordings; the effect of layering and juxtaposition of both the audio and the video and; the things you learnt from working with this kind of audio and video.

In the abstract exercise, we had to record several abstract sounds and videos for about 30 seconds. Since it was a night shooting, the first thing that came up to my mind was the lighting. I wonder if there is enough light out there for shooting a video. But then, when we went for shooting, the camera is able to shoot in low light and it turned out quite well actually.

We got several footages and I particularly love the water videos and we recorded the sounds of Water Flowing which I find it very relaxing. We also got a chance to shoot the shadow of leaf moving on wall which I personally think is really poetic. Overall I was pretty satisfied with the results, but there are a few things that could be improved upon. Foe instance, we can improve the shot in corner of the building which is not as poetic as the shadow of leaf. I also find it a bit difficult to focus on the night shooting because there was not enough lighting and I was thinking it might be a little bit out of focus.

After we looked at all the footages, I’m pleased that all the footages are in focus. Then, we started to record the haiku. We did it in 4 different languages: Mandarin, English, Indonesian, and Hungarian (if I’m not mistaken). Then, we started to edit the sounds first. We tried to layer the sounds with haiku.  The way we experiment it was unique for me, we edited the sounds by layering with the bunch of haiku sounds together. It was really fun doing the experiment with the sounds. Then after we edited it as a group, I tried to edit it as an individual and experiment with the sounds and videos. After I layered the sounds with the haiku together, I combined the sounds together with the abstract videos. A haiku, the abstract videos and sounds carry all those layers of meaning. I was amazed at this juxtaposition and sound quickly became an art-form. It represents the emotions. In this haiku exercise, I put the sounds of traffic light blinking at the end of the video with no video at all (just black). So, I think this kind of technique might work for death scene in a movie. For example, we can put the the noise of a machine for a dark scene like after the death of a character. In my opinion, this juxtaposition gives the experience of two different perspectives running at the same time. Another important point that Paul mentioned is it is better to not put the related sound and video together. For instance, don’t put the sounds of water flowing with the water videos. However, I didn’t realise that I use the sound of leaf moving together with the shadow of leaf moving video. But I definitely will try to use this method in the upcoming projects.

Things that I learnt from working with this kind of audio and video is it gives me a different perspective on seeing things. I usually did not really pay attention to small elements such as water flow. But, this exercise has inspired me to see other elements of my surroundings which is really wonderful. Another important point is since Paul always asked us to experiment with the sounds, videos and creates multiple versions of it, it gives me a different view in editing the videos. I personally think that this is a great exercise and I love the way it forces me to find ways to make something that could probably be very boring into something interesting.


Standard
Sound and Image

Assignment 3| #5 Colour Grade

In a sequence you’ve called ‘colour’ of whatever project you’re working on, you will have clips that are indicative of a particular colour or lighting state. (At least one of them should have a person in it – for skin tones) To the right of that clip you will have that same clip repeated 3  or more times with different colour grades on it. Take screenshots of each clip then upload to your blog the series of stills that show us ‘before and afters’ of your colour grading. Hint – google – before and after colour grade. Each with a description of what you did to the clip and why. Provide at least 3 clips with 3 grades on each and include the original. This is a learning exercise, not a qualitative one, don’t stress – it is the act of doing it and the reflection on that, that is important

Clip 1

This clip below is taken from the Lenny’s shot construction exercise.


1.1 Teal and Orange look

colorgrading2.2

Step 1

So, here is the first look that I created for my first clip. First, I did the colour correction such as the white balance, exposure, contrast, highlights, shadows, and any other components. Because I wanted to make it a bit warm so I played with the temperature and bring it up to about 42,4. Then I bring down the blacks a little bit around -4.3, and used the curves section to further refine the look using RGB Curves.


Step 2

After I feel the colour is balanced enough, I started to experiment with the color wheels. I applied some blue in the shadows, a little bit orange for the highlights and pull the Midtones to orangish and red side. I just tried to pull things back and pull things to be more strong to balance out the three adjustments. Because I wanted to get the warm vibrance so that the clip looks a little bit more of that moody look.

screen-shot-2018-06-03-at-01-58-33.png

Step 3

After I adjusted the color wheels, I go back to RGB Curves and did some experiment with each of the color as seen in the picture below. The clip is became more bluish.

screen-shot-2018-06-03-at-02-04-24-e1527956215338.png

Final step, I go back to the basic correction and change the temperature, adjusted the contrast, shadows and added some vignette to make the corner of the frame a bit darker.

new ssssss

Final Look

1.2 Dark teal blue look

colorgrading2.1

In the first version, the look is more teal and orange. So, I wanted to create another version of teal look. Since I wanted to create the look somewhere between dark blue and green, I just named it dark teal blue look.

Step 1

To create this look, I chose the SL Blue steel presets as my foundation from the Look section in creative settings.

Screen Shot 2018-06-03 at 02.39.07

Step 2

Because the color is a bit pale for me, Then, I started to play with the basic correction. I set the temperature to 12, bring the blacks down to -5.4, increase the saturation to 117,4, contrast to 25, white to 20,7, and exposure to 0,3. Also, I modified the RGB curves and tried to experiment until I get the look that making color casts more dramatic.


1.3

colorgrading2.3

I’d like to experiment with the colour and I prefer green color because I think it is kind of represents a destruction. So what I did is I bring the tint down to -34 so that the dominant colour would be green. As seen in the picture above, it is really green. Then, I played around and experiment with the RGB Curves. Below is the screenshots of what I did in the colour correction including RGB Curves.

NEW3

NEW2

I like the green background but the problem is the face is a bit too orange and a bit dark for me. So I wanted to make the skin tone looks more natural but I don’t want change the colour of the background. So I go to Effect Control—>Opacity—>Free Draw Bezier and used the mask features to change the skin tone and make it look a bit natural by doing the face mask. Then, I tried to experiment with the exposure, saturation and the HSL secondary so that the face is not too orange.

Screen Shot 2018-06-02 at 9.43.55 pm


This slideshow requires JavaScript.

Screen Shot 2018-06-02 at 9.42.31 pm

The picture above is the final results. As we seen in the picture, the skin tone is not as orange as in the previous clip.

Clip 2

This clip below is taken from the one of the Abstract Videos.


2.1. Warm look

2.1

After I balanced the clip by bringing down the highlights around 55 and the shadows down a little bit. As seen in the picture it is more darker now.  I wanted to make a feel of Fall in this scenes. So, I warming up the mids first. Then, used the Hue saturation curves to get the nice leaves colour and really bring out the warmth of the leaves. For the final touch, I applied basic adjustments to this clip such as adding some contrast and saturation just a little bit to make the leaves color pop up more.

2.2 Mysterious look

2.2

I wanted to make it a bit blue so adjusted the color temperature towards the blue a little bit more and lower the vibrance a little bit. I like the shadows to be deep and the edges to be sharp so I adjusted the shadows and slightly used the blacks for darken the blacks part of the clip (it’s also because I don’t really want to see the background behind the car). Then, I tweaked the exposure a little bit. Also, I played with the Hue saturation curves just the yellow and orange part to make the leaves looks more dramatic and a bit orange compared to the original clip. Final step, I adjusted the saturation level to help everything blend in a little bit more.

2.3 Day-to-Night look

33333

For the third versions of this clip, I’m actually a bit unsure if I am allowed to darken the clip as seen in the picture above. But I just want to experiment with it by changing it from day time to night time.

Step 1 

So, I what I did is first I created an adjustment layer. Adjustment layer allows me to apply the effect (color and tonal) into the clip without permanently change it. Also, it gives me a little bit more flexibility that makes it easier for me to experiment with color of the clip. So I put the adjustment layer on top of my clip. After that I created 4 lights for this clip and I set the first light to green as the base light.

Screen Shot 2018-06-03 at 00.32.10

Screen Shot 2018-05-31 at 19.25.56


Step 2

Then, I set the colour for the other lights. Since there is an utility pole in the clip, so I put the 2nd light right below the utility pole and I set the colour to yellow. Next, I set the light as the car lights as seen in the pictures.


Screen Shot 2018-05-31 at 19.29.25

After I changed the light color to yellow (for utility pole only) *Light type: Omni

Step 3

After I set all the lights, I created another adjustment layer to play around with the exposure, blacks, contrast, saturation of the clip. So I lower the exposure a little bit and darken the clip by dragging the blacks into -62. Then, I raised the saturation and contrast just a little bit. Below is the final look of the clip. In my opinion, the light under the utility pole is actually a bit weird and too bright at this point but it was fun playing around and experiment with the color.

Screen Shot 2018-05-31 at 6.19.41 pm

Final Look

Clip 3


lizzyfinal1

Effect used in this clip:

  • Basic correction: Slightly bring the temperature became more yellow, decreased shadows and whites, and dragged the tint toward the green a little bit.
  • 2 lights: I used the same technique as the clip 2.3 above but I only used 2 lights in this clip. So I put one light on the wall and one light on the box (in order to make the box pop up).
  • Vignette: Add vignette to make it more darker in each corner of the clip.

3.2

lizzyfinal2

Effect used in this clip:

  • Basic correction:  I wanted to make the suspense feel so I bring my exposure down, dragged the temperature towards the blue a little bit more. Also, I increased the contrast and saturation.
  • Curves: I wanted to experiment with the color so, in the color wheels, I tried to pull the shadows to blue and play around with the midtones and the highlights. So the color is mixture between blue and green. Then, I adjusted the RGB curves until I get the look that I want
  •  I also slightly applied Fade effects.

3.3

lizzyfinal3

Effect used in this clip:

  • Basic correction:  significantly increased the blacks and the the slightly increased the contrast. I like the blacks to be really deep, slightly adjusted the highlights
  • Vignette: Add vignette a little bit.

Clip 4

colorgrading11

Effect used in this clip:

  • Basic correction: significantly increased the blacks and the shadows to create a dark look. Then, increased the whites a little bit, slightly increased the contrast and adjusted the highlights.
  • Curves: created a slight little S curve in the white section in RGB Curves. Also, I think the leaves color is a bit dull so I played around with the red and green color in Hue saturation Curves to make it more pop up. Then, slightly dragged down the white RGB Curves.

colorgrading22

Effect used in this clip:

  • Look from the creative: I applied the ‘SL Gold Orange’ presets look from creative settings.
  • Basic correction: Significantly increased the highlights to 71,3, slightly increased the shadows to 16 and whites to 21,5. I wanted to be a bit dark so I dragged the black down to -5,3. Then, I just adjusted the exposure a little bit.
Standard
Sound and Image

Assignment 3|#4 Reflection on The Lighting Exercise

Consider the lighting lecture online, the lighting class and the exercise you shot. This prompt is for you to review all that you’ve learnt about lighting and apply that knowledge to a reflection of the exercise you lit and shot – you don’t have to limit yourself to your own work, you can look at the other group or tute’s work. Feel free to embed screen grabs, diagrams or other material and similarly you could bring in other research. You could talk about: the kinds of light, the kinds of lights that you’ve used, the motivation of the light, how light affects the shot, how lighting affects the shooting procedure, how would you go about figuring out the lighting for your next shoot etc. This does not have to be an academic piece of writing – it’s more to get you to think and reflect upon lighting. We understand you’ve only started on the lighting journey.

_______________________________________________________

Lighting is one of the most important aspects of making a video. Lighting can creates a mood, a look and feel for the video. But it’s not just about pointing the light anywhere to ‘brighten up’ the scene, there is an actual technique to do it. In week 9, we learned about lighting technique called the 3 Point Lighting. This technique works with a fill light, key-light and back-light.

  • Key light: Prime source of light on a scene.
  • Fill light: Reduce the contrast of a scene (fill in shadows caused by other lights, mainly a key light).
  • Back light (Rim or Hair light): helps to separate the subject from the background, add some dynamic and creates mores depth. Basically it gives the 3d dimensional look.

In this exercise, we did some experiments with light. We tried to experiment just by replacing the 3 lights with with different sources. First, we prepared all the lighting equipments. Then, we turned off all the lights and start with a clean slate. Once we have turned off the lights, we started to set up the key light, fill light, and back light. Below are the two examples of results:

Example 1

Screen Shot 2018-05-31 at 00.02.28

In the first example, the key light is positioned on the side of the subject (Josh), back light is positioned behind Janine. As the main light comes from Josh’s left side, it caused harsh shadows and bright highlights on left side of Josh’s face. There is also not much lights on Janine’s face. I can barely see Janine’s eyes. According to Lightscameraaction (2018), “a good way to really bring some life into the subject is to make sure they  have some eye light.” I also noticed the darkly shadowed left side of Josh’s face and bright highlight on right. In my opinion, it may need to be repositioned to achieve the better results. But actually it depends on the story, the look, or desired result that we are trying to achieve.

Example 2

Screen Shot 2018-05-31 at 00.02.51

In the second example, we tried different way to set up the light in order to make the shots visually more interesting. Not only the lights set up that matters but also the camera set up. Because lighting is all relative to which way camera is facing and where the subjects facing. So, what we did is we first moved the camera to the front of the subjects and we’ve got the camera facing down a little lower than it was so that we can have a nice head space. Then, we tried to dim the key and fill light down, brighten the back light up a little bit more and set up the white balance. As we can see in the picture above, the temperature is more warm and the transition between the light and dark is more gentle compared to previous set up. It gives some nice variation in Paul’s skin tones because it is kind of accenting the dark side of his face.

The use of back light defines an outline that helps separate the subjects from the background. It creates a nice highlight on the Janine’s hair and Paul’s shoulders as the back light is positioned behind her. Although, it is still a bit underexposed on parts of Paul’s face, it still gives a very dramatic look and looks particularly moody.

It was a very interesting experience as I get to learn a different approach to set up the lights and change the mood and tone of a scenepick the right look for the story. For instance, a hard side lighting creates lots of drama, while a soft front light creates a softer mood. So, I believe by experimenting in lighting direction and the softness of the light, it can creates different effects and moods in a photograph.


References:

Lightscameraaction 2018. 5 quick tips to light your interviews better. Available from: http://lightscameraaction.info/5-quick-tips-light-interviews-better/. [ 1 June 2018]

Standard
Sound and Image

Assignment 3|#3 Forbidden Lies

In this clip from Forbidden Lies (Links to an external site.)Links to an external site.,, Anna Broinowski’s 2007 film: describe in detail all of the audio (except the music), how it may have been recorded/sourced and how you think it has been edited/layered in post.

Screen Shot 2018-06-02 at 19.11.31

Picture 1

The clip starts with the soft romance music as a background. Then, to set a romantic mood, several Foley sounds are added such as bird sounds, wind sound effects (only at beginning of the clip). The ambience of the two characters (Dalia and the guy) have a calm and relaxed feel with the sounds of wind through trees and peaceful park. The pleasant sounds are reminiscent of their love story. Also, when the guy feeds her a cherry, there is a bell sound effect followed by a slow spin rotation transition changes to the next scene.

Screen Shot 2018-06-02 at 19.12.53

Picture 2

After the scene in the park, it changed to car scene where I can clearly hear the car coming. The car engines is clearly heard When they are staring each other’s eyes, there is a bell sound effect. When Dalia throws her scarf, there is a wind sound effect as Dalia throws her scarf. I think that sound effect could be created by swinging a sword. Then, followed by the scarf dropped on the ground sound effect (0:21). But I think the sound effect used in the part where the scarf dropped on the ground is a bit too loud. Maybe when they recorded the sound, the boom is too close to the object but I’m not sure as well. In my opinion, it seems like something heavy has dropped e.g. rock or tool being thrown against a rock sound effect.


Next scene is where Dalia is walking in the middle of dessert. In my opinion, the footsteps sound is not really match with the her actual footsteps but I think it not a big problem because I still can hear the noise of the sand produced by her footsteps. Next, As the transition dissolve additive dissolve transition (from pic1 to pic 2) the is a transition from pic 1 to pic 2, there is also a whooshhh sound. I would say its a wind sound effect. When the music clip stops, there is a tape clicking sound and also hand hitting a wooden table sound effect.

Then, Rana starts talking about the book and they used the Cha Ching money sound effect as the transition. Since Forbidden Lies is a documentary that reveals the truth of  the murder case of a young Muslim woman in Jordan, one of the atmospheres is created with the use of Mosque prayer call sound effect. It is used to give the viewer a sense of a familiar of the place I guess. The voice-over of Rana is also used along with her footages such as the magazines, old photos of her and her workplace. While she is typing, the editor also adds the keyboard typing sound which is great. After that, I hear a sound like a bell on door ringing as the door to a local shop is opened. From that, I noticed they used a Cha Ching money sound effects and a bell on door sound in most of transitions in this clip. When Dr. Amal discuss the truth of the book, I can hear the birds sound. I think it is because the place where she is being interviewed has green leaves and most likely she was in her backyard. Therefore, the sound of birds is added to the scene. The part that intrigues me the most is when the voice of Rana while reading the book is over-layered with the voice of the author of Honor Lost, Norma Khouri. Then, it changed to the clip where Norma Khouri reads the book.

Overall, there are several variation of the sounds used in this clip. I think the editor used several layers for the audio in this clip: Background music, Ambient sound effect, Foley, and Character voice. I personally think through the use of layering effects, the audience can feels the tension of the clip. Also, I like the way the editor layered the clips when they try to reveal the truth, with the Character’s voice-over in it.

Below is the list of sounds that are used in this clip (based on my hearing):

  • Birds sounds
  • Car driving (0:15)
  • Bell sounds (0:18; 1.04;)
  • Wind sounds (when she throws her scarf) (0:19)
  • Scarf is fallen on the ground (0:21)
  • Footsteps in the sand (0:27)
  • Tape clicking (0:30)
  • Hand hitting wooden table sound effect (0:30)
  • Cha Ching money sound effects (0:36)
  • Drop the book on table (0:41)
  • Mosque praying (0:48)
  • Keyboard typing (0:57)
  • Camera Shutter Sound effects
  • Heartbeat Sound
  • Wind
  • Crinkly Paper
  • Closing a Book Sound Effect
  • Drop the book on table
  • Snake Hissing Sound Effect
  • Hair Clippers Sound Effect
  • Lighter Lighting Sound Effects
  • Coins
  • Money sound (When the guy take out the money from his wallet)
  • Construction sounds


Standard
Sound and Image

Assignment 3|#2 No Direction Home

An opening scene can sometimes be seen as a precursor to the rest of the film. Describe all of the information released in this beautifully constructed 2 min sequence edited by Thelma Schoonmaker that opens Martin Scorsese’s 2005 film, No Direction Home (Links to an external site.)Links to an external site.. What do you think Scorsese and Schoonmaker have told us about the rest of the film?

MV5BMjAwMDk0NDY0Ml5BMl5BanBnXkFtZTcwOTMzMzE2MQ@@._V1_

No Direction Home” is a documentary by Martin Scorsese’s that illuminates the life of Dylan. At the beginning of the video, Scorsese has assembled a performance clip of Dylan with his electric guitar. Then, it suddenly became silent and the video slowly transitions from the concert of Dylan to a compilation of his old footages. A snowy transition with Dylan’s voice-over is a perfect way to bring back scenes from the protagonist’s childhood.

After that, a background music starts again and brings back the old memories from his past. I personally think the combination between the old footages his voice-over alongside his story was an interesting way to repurpose the past. Not only with the old footages but also Scorsese combined it with the recent Dylan interview, the music, and the sound effects which keeps audience’s interests throughout the clip. The black-and-white footage was an obvious match to the Dylan’s dreamlike memories and I would agree that Scorsese mixes together the perfect combination of mystery of his past and reality. 

Also, I believe that Schoonmaker has picked up the most interesting and the important part of Scorsese’s documentary. Because it attracts me at this point and also it can be seen that this 2.52 minutes clip summaries briefly the beginning of Dylan’s journey. Although, there isn’t much deep inquiry into Dylan’s lives (since it’s only the beginning), it is an interesting look into the journey of Dylan. From there I think the rest of the documentary would bring me back to Dylan’s childhood and tells more about his career journey.

Standard
Sound and Image

Assignment 3| #1 Introduction to Documentary

This reading (Links to an external site.)Links to an external site. is taken from Bill Nichol’s seminal book Introduction to Documentary which articulates the different modes of documentary. (This reading (Links to an external site.)Links to an external site. outlines each mode in different sections. Vanessa (thanks) pointed out that the other reading doesn’t cover Poetic and Expository in its own section – You don’t have to read or reference this one if you’ve already done this part of the assessment.Narrowing it down to these modes can be seen as reductive but definitely a good way to look at documentary as long as you don’t see this as the only way. This reading (Links to an external site.)Links to an external site. is a quick summary. Choose one mode and describe its hallmarks and why you might like to work in that way. This, and the following two prompts will prime your thinking for documentary production in future semesters

According to Bill Nichol’s seminal book Introduction to documentary, there are six modes of representation in documentary film and video that function something like sub-genres of the documentary genre itself: poetic, expository, participatory, observational, reflexive, and performative. From those six types of modes of documentary that Nichols presented, I might want to work between observational and participatory mode. But I can see myself more making the participatory mode documentary in the future. Bill Nichols described observational mode of documentary as “a series of ethical considerations that involve the act of observing others go about their affairs”. I personally think that observational documentary is more like a life storytelling. It attempts to capture objective reality and there is no visible influence from the filmmaker.

While participatory mode of documentary involves the subject to participate with the filmmaker rather than observes the subject. Interviews is one of the common examples of participatory interaction. So, the filmmaker will set up an interview and asks the subject several specific questions in order to hear their side of the story. According to Bill Nichols (2001), “The researcher goes into the field, participates in the lives of others, gains a corporeal or visceral feel for what life in a given context is like, and then reflects on this experience, using the tool and methods of anthropology or sociology to do so.” The study of anthropology is common in participatory documentaries because the filmmaker not only interacts with the subject such by living among a people for a period of time but also observe them and study. Many documentary filmmakers believe that the participatory mode is the true cinema verite or film truth. Some examples of this style of documentary filmmaking include Chronicle of a summer (1967) and Ross Mcelwee’s Photographic Memory. Chronicle of a summer (1967)  is a 1961 French documentary film shot during the summer of 1960 by sociologist Edgar Morin and anthropologist and filmmaker Jean Rouch. In the film, they talk at length about politics, arguing on film and street interviews is used where people talk about their experiences and ambitions, and most notably, whether or not they are happy. The documentary begins with a market researcher, Marceline, on the street, asking a simple question, “Are you happy?”. I personally think this is a great example of participatory documentary and it is an amazing study of varied perceptions as the filmmaker captures how things are perceived by the on-camera subjects themselves.

Although, I find it interesting to work in a observational mode of documentary but I feel like participatory mode of documentary would suit me better.  The reason why I might like to work in participatory mode of documentary is because I’d love to go into the field, living with them, and filming reflections on my experience of living with them. Also, I agree that living with them can be a very valuable experience. Aside from that, I also want to hear the story from their perspectives (by asking them several questions) and I want to document reality as real and as truthfully as possible so that the audience can feel the emotions and feel like they are a part of it. For me personally, participatory documentary is very interesting and engaging the audience compared to other modes.

References:

Nichols, B 2010, Introduction to Documentary, 2nd ed.,  Indiana University Press, Bloomington, IN, pp. 179-194.


Standard
Sound and Image

Assignment 3: Analysis / Reflection

#1 Introduction to Documentary  

https://veronicaonggoro.wordpress.com/2018/05/16/assignment-3-1-introduction-to-documentary/

#2 No Direction Home

https://veronicaonggoro.wordpress.com/2018/05/16/assignment-32-no-direction-home/

#3 Forbidden Lies

https://veronicaonggoro.wordpress.com/2018/05/16/assignment-33-forbidden-lies/

#4 Reflection on the lighting exercise 

https://veronicaonggoro.wordpress.com/2018/05/16/assignment-34-reflection-on-the-lighting-exercise/

#5 Colour Grade

https://veronicaonggoro.wordpress.com/2018/05/16/assignment-3-5-colour-grade/

#6 The Abstract / Haiku edit 

https://veronicaonggoro.wordpress.com/2018/05/16/assignment-3-6-the-abstract-haiku-edit/

#7 Reflection on the course 

https://veronicaonggoro.wordpress.com/2018/05/16/assignment-3-7-reflection-on-the-course/


Standard